


Noah 4 allows you to configure:
- the entries that appear when adding a new patient to the database, including which entries are required or optional
- the listing options for the Patient Browser (for example, First Name, Last Name, etc.)
PLEASE NOTE: For configuring patient categories, please click here.
Description
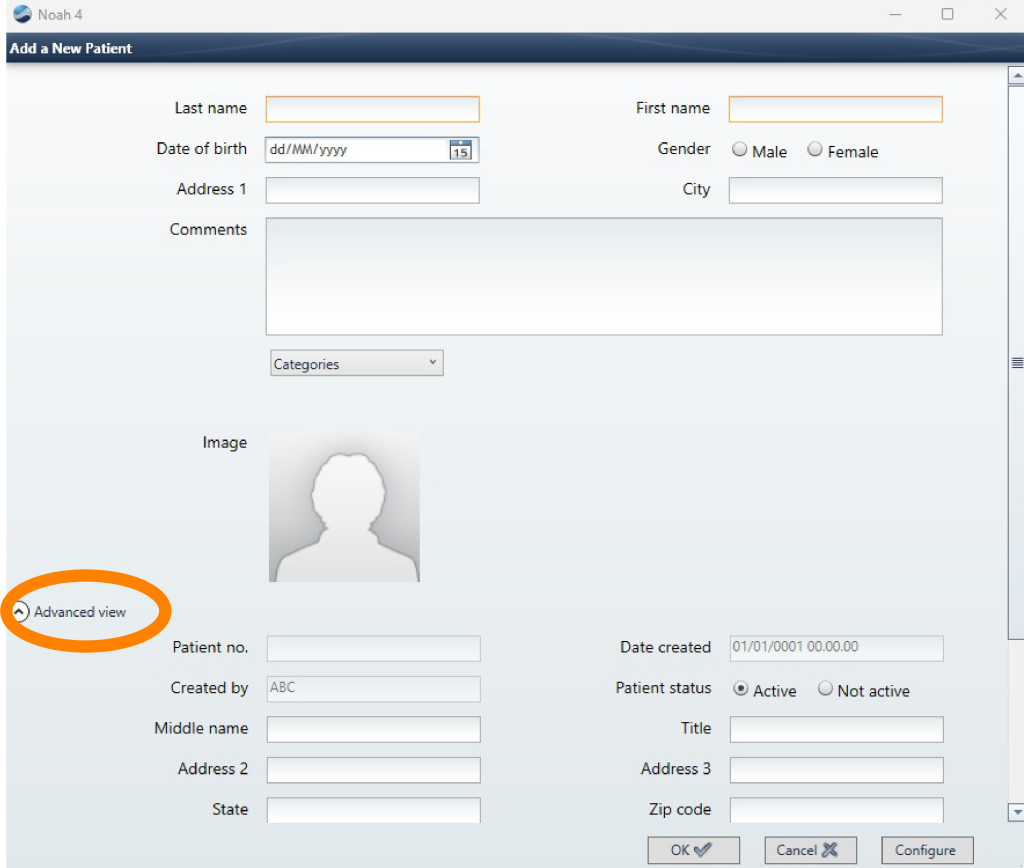
With the ‘Add New Patient’ window you can add or remove fields, and make certain fields required, which means the user is required to fill them – these fields appear next to a yellow entry box (‘Last name’ and ‘First name’ in the screenshot below). You can toggle the window to show the Advanced View, which lists more fields.
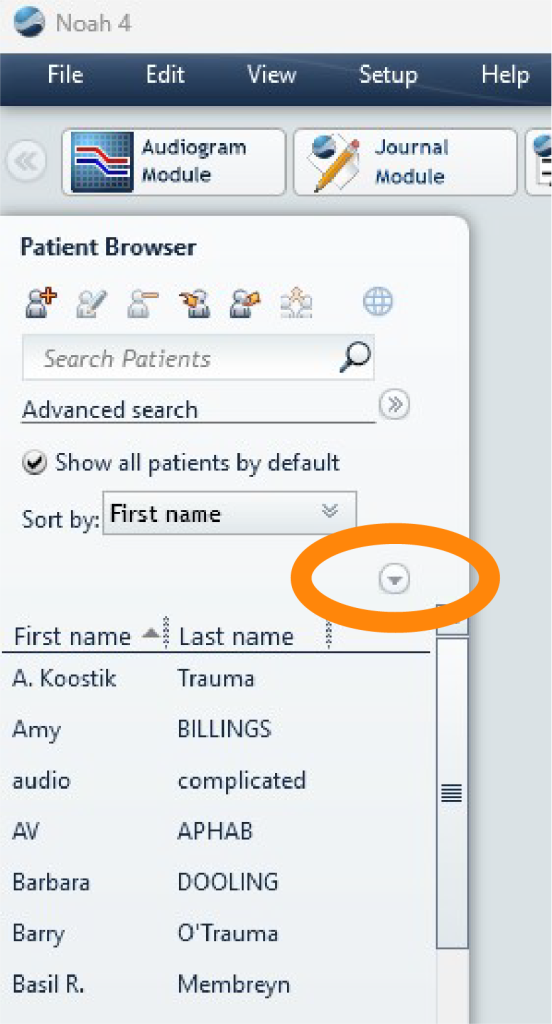
The Patient Browser is located on the Main Screen. You can configure the listing options available under the drop-down arrow. In this instance, ‘First name’ and ‘Last name’ have been selected.
Instructions
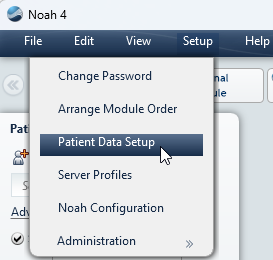
1. In the Noah 4 main screen, select Setup > Patient Data Setup to open the Patient Fields Configuration window.
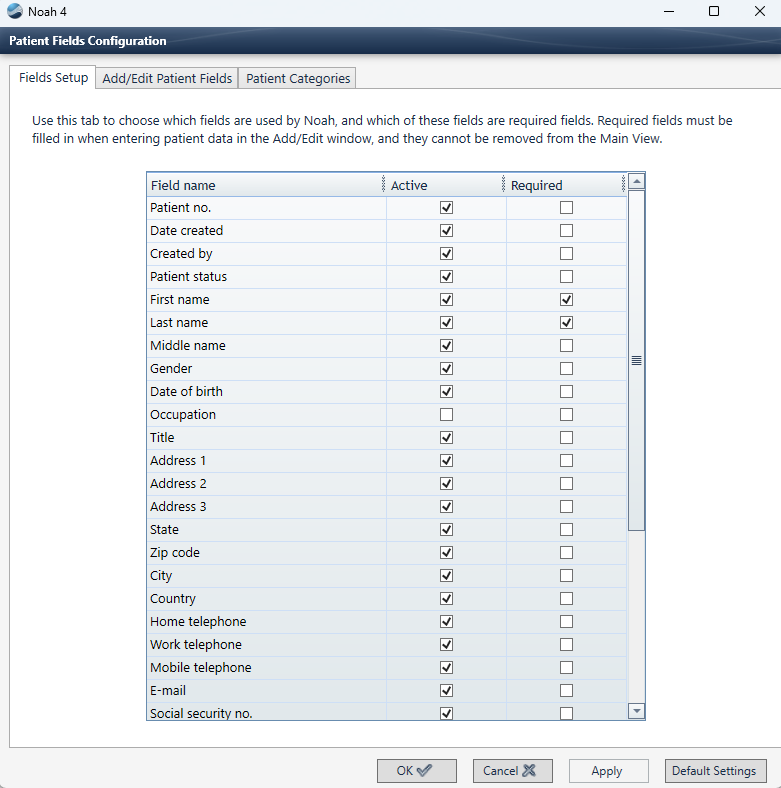
2. In the Fields Setup tab:
- check a box under Active to list the entry in the Add New Patient window AND also in the listing options for the Patient Browser.
- check a box under Required to require the user to fill this entry in the Add Patient window.
3. In the Add/Edit Patient Fields tab (which can only be accessed by the Administrator), select an entry and click on:
- the Up/Down button to change the order in which that entry appears in the Add/Edit Patient window.
- the Add/Remove button to add or remove that entry.
- the Edit button after first selecting Other 1 # or Other 2 # – these are the only options can then be renamed to fit your needs.
- NOTE: Required fields appear with an asterisk (*) in the screenshot below. They cannot be removed from the Add Patient window, and appear there next to a yellow entry box. Use the Fields Setup tab (Step 2 above) to change the required fields.

4. Click OK to save your changes.
 HIMSA
HIMSA